Pyplok®
Pyplok®
Pyplok® is a weld-less, thread-less way of joining pipes. It has been successfully used in the most demanding environments where fire safety is essential and there is a need for quick and easy solution to maintenance repairs.

Being a non-welded and threadless fitting, Pyplok® has a lot of advantages to offer from traditional pipe and tube fittings. It is a very versatile fitting which is used in high pressure piping and also utility piping applications.
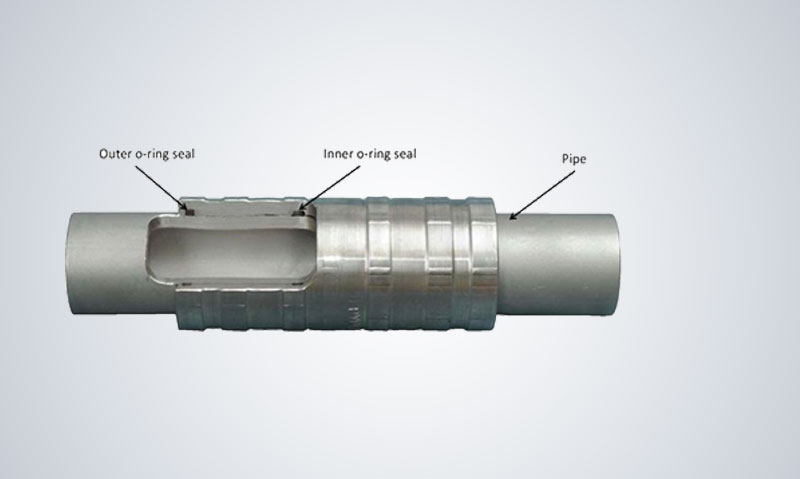
Using a portable, hand-held installation tool, couplings are cold worked and permanently compressed onto the pipes, thus forming a permanent leak-tight seal. There are two sets of seals: an Inner O-Ring seals and an Outer O-Ring seals. The outer O-Ring seals prevents outside contaminants from entering the system.
Pyplok® is available in Carbon Steel, Stainless Steel Type 316L, Copper Nickel 70/30, Copper Nickel 90/10, Duplex and Super Duplex material. They are available in sizes from ¼” to 4” NPS, from 6mm to 115 mm Metric tube, and from ¼” to 2” Imperial O.D. tube, with allowable pressure up to 9,300 PSI (640 BAR). Please refer to the Fittings pressure Chart. Pyplok® can be also used across different material grades of tubes. The O-rings as standard come in Viton, EPDM or can be ordered from a choice of seal materials which can be suitably supplied according to the requirement and have an operating temperature range of –65°F to +400°F (–54°C to +205°C). Pyplok® comes in all kinds of shape and sizes. TMI provides different set of Models to meet the installation standards on Pyplok®. Click here to know about Pyplok® Tooling. Pyplok® Models needs basic training to operate and the same could be provided by us.
Pyplok® Applications:
- World Navies
- Fire Suppression Systems
- Refinery Maintenance
- Desalination Plants
- Offshore
- Shipbuilding
Pyplok® Whitepapers:
Videos
 Heating Coil Repair
 ADNOC Water System Upgrade
 Hibiscus Petroleum 30+ Years Service
Certification
Pyplok® has undergone all the stringent tests like
1. Proof Tests:
Gas Leakage Tests, Hydrostatic Proof & Burst Test
Gas Leakage Tests, Hydrostatic Proof & Burst Test

2. Mechanical Tests:
Impulse Test, Vibration Tests, Impulse/Flexure & Fatigue at low temperature test, Tensile Test, Torsion Test, Heat Aging Test, MIL-S-901D (High Impact Shock Test), Spanish Navy S-80 Shock Tests.
Impulse Test, Vibration Tests, Impulse/Flexure & Fatigue at low temperature test, Tensile Test, Torsion Test, Heat Aging Test, MIL-S-901D (High Impact Shock Test), Spanish Navy S-80 Shock Tests.

3. Fire Tests:
ISO 19921:2005 Fire Test, API 6FB Fire Test
ISO 19921:2005 Fire Test, API 6FB Fire Test
For more info on the tests please refer to the Pyplok® Technical Information Package
Type Approval Certifications
Approvals
Instructions to install a Pyplok® Connection
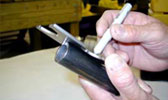
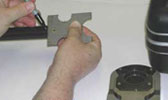
Step 1
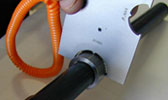
Cut pipe end square, deburr and clean. Position swaging tool to mark pipe as shown. Ensure that pin is against end of pipe. Mark pipe through marking slot.
Step 2
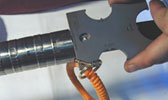
Make a second mark at the end of the swaging tool. This mark will be used to inspect position of the coupling after it has been crimped. Note: For easier assembly, use a white marker (fine paint stick or white out pen) to make marks on pipe.
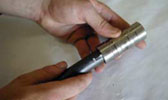
Step 3
Slide coupling on the end of the pipe to first marking.
Step 4
Insert end of other pipe into coupling so the ends of pipe touch inside of the coupling. The Markings should be visible as shown.
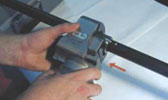
Step 5
Slide upper head assembly over coupling. Slide power unit with attached lower head assembly into upper head assembly. To crimp, hydraulic pressure from the power unit extends the cylinder which squeezes the upper and lower head assemblies together. This action mechanically swages the coupling to the pipe. The crimp is complete when the head bottoms out and the gap closes.

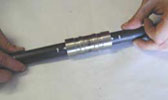
Step 6
Finally, Inspect the position of the coupling. The Inspection marks must be fully visible outside the coupling.
Step 7
Verify the swage diameter with the help of the inspection gauge.
Step 8
Finally verify the secondary marking with the inspection gauge. If found confirming, then the Pyplok® crimping is successful.
For in-depth information on the installation, please download the installation manual
Alternatively send us an email to info@chaseresource.com to avail physical copy of the Catalogue.
Alternatively send us an email to info@chaseresource.com to avail physical copy of the Catalogue.